Website on a Pi
How to host a website on a Raspberry Pi
Want to be next to your beautiful website at all times? Don't want to pay someone else for hosting? Hosting a site on a 3-inch long, $35 motherboard may not be as simple as paying for a hosting service, and definitely isn't the best commercial solution, but that didn't stop me from doing it for fun and sharing what I learned in the process.
First off, it won't be free. Here is what you'll need:
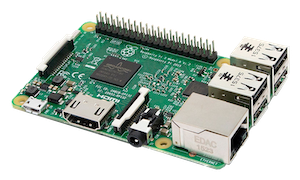
- A server. I use a Raspberry Pi 3 B+ because it only costs $35 and has a low electrical usage.
- An Ethernet cable or WiFi to connect to the Internet.
- A micro SD card for the Pi to act as the hard drive necessary for booting. I recommend getting a 16GB card pre-loaded with NOOBS.
- A monitor, HDMI cable, USB Keyboard, and USB Mouse if you plan to use the Pi GUI, which I recommend.
- Your website's source files on another computer.
Of course, you will also need an Internet Service Provider (like AT&T or Verizon) and electricity. Don't underestimate the power though; it can rack up hundreds of dollars a month if you use a powerful server. Also, check that your ISP allows you to host a website from home. As of July 2018, AT&T allows it but Verizon may not. Getting all the necessary parts working was perhaps the hardest step for me, as my first Pi's SD card got corrupted, and after ordering the second card my Pi blew a fuse after one boot, and I had to order a brand new Pi.
Hello Pi
Now that you have all the parts- and they work- it is time to turn it on. Connect the Pi to a monitor, mouse, and keyboard, and insert the micro SD card into the Pi. Now plug in the Pi, and it should boot up. A word of caution: always make sure you shut the Pi down properly. Never pull the plug on your Pi! Doing so risks corrupting the SD card as I did. The proper way to shut down is from the GUI's menu in the top left, or from the command line interface with:
sudo shutdown -h now
Hopefully, your Pi has booted up successfully. You should see a list of Operating Systems to install, assuming you bought an SD card pre-loaded with NOOBS. Install Raspbian. If your SD card was not pre-configured with NOOBS, then you will have to download the Raspbian image onto the card. When your Pi shows the Desktop after a few minutes, you know it works. Go ahead and set up the WiFi and everything else it prompts you to do.
Installing Apache Web Server
My first Pi updated everything for me when I booted it the first time, but my second Pi did not. To be safe, open Terminal on your Pi and run the following commands:
sudo apt-get update
sudo apt-get upgrade
Now it is time to install Apache, which will let you run your web server right from your computer. Run the following to install Apache:
sudo apt-get install apache2
You may also want to download PHP and MySQL. Here are the commands for that:
sudo apt-get install php php-mbstring mysql-server php-mysql
At this point, you should be able to type in "localhost" into your Pi's browser, and it should show a page saying "It Works!" But what is localhost, anyway? Localhost, aka 127.0.0.1, is the IP address your computer uses to identify itself. So when you type in localhost into the browser URL bar, it directs you to your own computer and marks up your website since your computer is serving a website on TCP port 80. In your home network, your computer has a local address allocated to it. Discover your Pi's local IP by running this on the command line:
ifconfig
This will output your computer's interface configurations. Towards the top, you should see "lo0" displaying the loopback address 127.0.0.1, which is your localhost as I just mentioned. After that, you should see under "en0" something like
inet 192.168.1.80 netmask 0xffffff00 broadcast 192.168.1.255
This sample response would mean your local IP is 192.168.1.80. Your local address is usually of the form 192.168.x.x or 10.x.x.x. Just for fun, go to any computer on your network and type in that address into a browser's URL bar, and you will see your Pi's localhost. Now you need to make it so that any computer in the world can see your Pi, not just others on your private network.
Copying the Files Over
Now it is time to get rid of Apache's boring success page and put in your website's files. Apache's success page has information worth taking note of, especially the file path. On a Pi running Debian, the main file (index.html) should be located at
/var/www/html/index.html
Now let's replace that index.html with your website's files that should already be located on your personal computer using SSH and SCP. Go into your Pi's Configuration Settings and under the Interfaces tab enable SSH. Also, change your password to something more secure under Configuration Settings. Now, from your personal computer where the files are, check that you can reach the Pi by pinging its IP address (substituting the real one in):
ping 192.168.1.x
The ping should show bits of information being sent successfully between the two computers. If it times out and doesn't work, then you are pinging the wrong IP, or the two computers are not on the same network. Once you verify that your personal computer can talk to the Pi, let's use SSH, or Secure Shell, to open up the Pi shell right from within your personal computer. (Note that if you are using Windows, you might have to download PuTTy to use SSH.) Check that you can SSH into the Pi by running the following command from your personal computer, again substituting the real IP:
ssh pi@192.168.1.x
"pi" is the default User for the Pi, but if you're signed in as someone else use that username instead. It will prompt you to enter your Pi's password, and even though you won't see the keys being typed, they are definitely being processed. Now that you've verified you can access the Pi's terminal from your computer, it is time to copy the files over. You can do that with Secure Copy, which Mac has built-in (but may require WinSCP on Windows):
sudo scp -r /path/to/source/. pi@192.168.1.x:/var/www/html/
This will copy all the files located on your computer under the /path/to/source/ folder to the Pi's Apache folder. "sudo" gives Super User access to the command which would otherwise be restricted since the Apache web files are sensitive. "-r" signifies that the secure copy is to be done recursively, meaning that every sub-folder under that path will also be copied. To see if it worked, type in localhost into your Pi's browser again (or, your Pi's local IP into any local browser) and see if it displays your website. If it did, great! Else, it can get tricky here. I was able to ssh into my first Pi, but not my second - all of the ssh files were corrupted beyond reasonable repair. What I ended up doing was enabling SSH on my Mac, and running the scp command from my Pi in reverse; namely
sudo scp -r username@IP:/path/to/source/. /var/www/html/
You can find your personal computer's username and IP by running "whoami" and "ifconfig" like before. But the beauty of SSH is the ability to access the Pi remotely. So I set up my Pi as a VNC Server and accessed it from my Mac as a Virtual Machine to be able to access it remotely. Hopefully, you won't have to do this, but this should work if SSH fails. Now it's time for the world to see your creation.
Port Forwarding
Before opening up your precious Pi to the World Wide Web, you will have to set up Port Forwarding on your home's router. The router is the magical little black box your ISP hands you that (hopefully) includes a Firewall to restricts outside computers from accessing your home network. Usually this is the desired behavior, but in this case, you will have to configure your Firewall to make a hole the size of a Raspberry Pi. Instead of connecting your Pi straight to the internet, you will use your Router's Firewall and specify your router's IP address to connect to the web. To do this, you have to set up Port Forwarding, whereby your router will forward specific requests to specific devices on the network. In this case, you want all HTTP requests sent to your router over TCP port 80 to be forwarded to your server, which will then handle the request and return a response to the client.
Now let's configure the router. My router has an IP address on it labeled "See here for Advanced Configuration" that I typed into a URL bar. It took me to my home network's site where it then allowed me to adjust the firewall settings and set up port forwarding. If your router isn't as great as mine, a quick Google search of "how to configure a brand X router" will suffice. Now that you are on your home network configuration site adjust the Firewall settings to allow port forwarding to your Pi for web server requests. Use your Pi's local IP address and forward TCP port 80, and you should be good to go.
The Domain
The last step is to configure your Router's external IP with the Domain Name Servers all around the world. Domain Name Servers map web server IP Addresses to domain names (like "google.com") so that whenever you type in a domain name into a URL bar the DNS servers first resolve that domain name to an IP (like 172.217.0.142) and then make an HTTP GET request to the web server on port 80 at that address. Your Pi already has an IP; now it just needs a domain name. Note that you don't really need a domain name; you could stop right now and just tell people your website is at your router's external IP address and people all around the world would be able to use it. However, it's only $12 to purchase a domain on Google Domains, plus they provide free WHOIS protection and have an easy setup so you might as well. If Google doesn't have what you're looking for, you can buy a domain from any other registrar, like GoDaddy.
Once you've secured your domain, you will need to hook it up to your Pi's external IP, which is really your router's external IP. First look up your external IP by going to https://www.myexternalip.com/raw. Note that if you do not have a static IP you will want to either, well, get a static IP or use Dynamic DNS and set up a synthetic record. Now add your external IP to your domain. In Google Domains this is done by going to Configure DNS and then adding a Custom Resource Record. Unless you have specific needs, put in the defaults: "@" for Name if you have no subdomains, "A" for Type, and then "1 hour" for TTL. After you submit that, it will take a while for the DNS servers to update the new data, as there are many around the world. It took me about a minute to have willsaid.com show up.
Following the brief wait, congratulations! You are now hosting your website from home on a Raspberry Pi!